We’ve got the car, parts and some willing staffers. Now to put it all together…
Converting a supermarket trolley into a race car is no small task. It took us almost a month to find the right car, and then we only had about a month to get it built ahead of the first race. Which is this weekend. No pressure then. Enter our team ringer, Olly Lewis, an engineer from Caterham and a veteran not only of the 620R’s development, but also the job of twice rebuilding his Marcos. Safe hands? Well, aside from almost cutting his leg off, yes…
So what’s required to go EnduroKa-ing? Well, as a budget race series, the regulations are fairly restrictive to keep cost down and even when you can change a part, it’s controlled to ensure a level playing field. MSV worked with Burton Power to develop the control parts which include suspension dampers and springs, Powerflex polyurethane bushes, brake pads and braided lines, a roll cage and tyres. Other than safety gear, there are no other modifications allowed.
I use safety gear there as a catch-all – the list, it turns out, is extensive. Both Motorsport UK and MSV take it very seriously so everything – the roll cage, seats, harnesses, fire extinguishers and racewear must all comply with strict standards and are checked by scrutineers ahead of each race.
Beyond that, any servicing related parts have to be bought from Ford with OEM part numbers, so my first call was to the local dealer to buy a stack or service items and a few spares. My second call was to Burton Power who are handily not far away in Ilford, Essex. On the first day of the build, I jumped in the car and drove up there to fill the boot with race car parts. Thanks to Brexit, our roll cage was held up at Calais with no ETA on when it would arrive. Which wasn’t stressful at all.
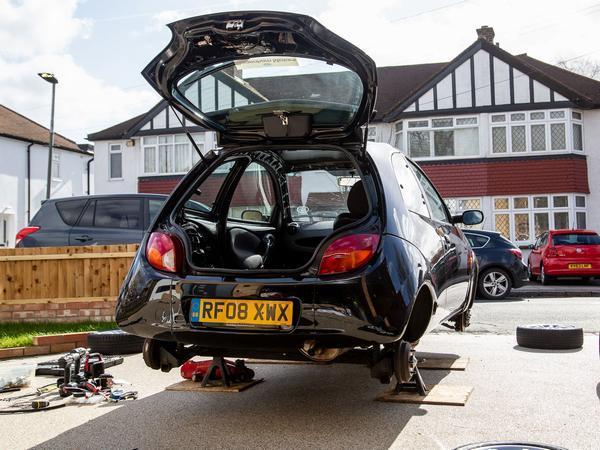
Truth be told, we were offered some workshop space to build the car, but in keeping with the do-it-yourself theme we chose to build it on someone’s driveway. Olly’s expensively laid brand-new driveway, to be precise. Cue the music…
Interior
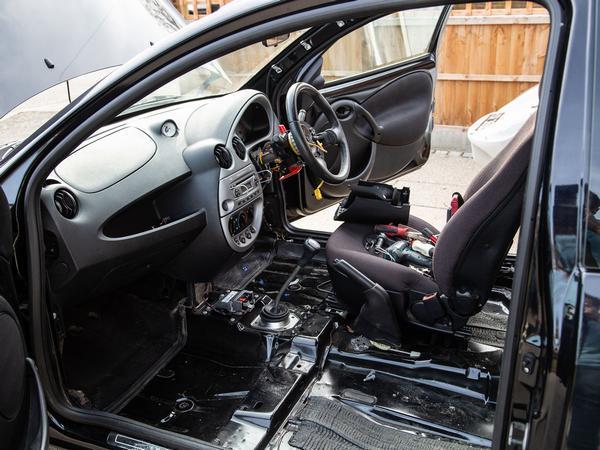
First up, ridding the car of its fixtures and fittings. Unsurprisingly, this was one of the easier tasks. Everything came apart so easily so we had the whole job done in a couple of hours. Some teams have taken out all of the sound deadening but ended up with a car lighter than the required minimum weight (950kg with driver), so we’ve left it in for now as it’s going to be a bugger to remove if we need to. We kept hold of the driver’s seat and seatbelt for driving the car to get the roll cage welded in.
Suspension
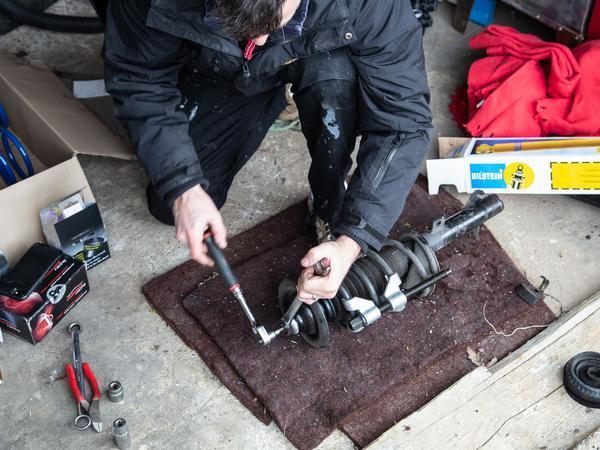
As detailed above, the suspension components are all control parts from Burton Power so everyone has to use the same bits. We started on the poly bushes, springs and dampers. As our car has spent most of its life in a garage and completed a measly 23,000 miles we were didn’t have to suffer any seized or heavily corroded bolts or nuts.
The front anti-roll bar bushes were dead simple although the front wishbones did require a trip to a press. To save stripping out the rear beam completely, there’s a handy bush removal tool you can buy (thanks for the tip Andy Burton) to do it in place. They’re £100+ from Ford but we picked ours up for less than £30 off eBay. Other than the top nuts putting up a bit of a fight on the front dampers, the suspension all came off easily and the new non-adjustable Bilstein dampers went on with the control springs and look fantastic.
Brakes
After a six hour delay in which Olly managed to deliver a nasty cut to his leg while cutting up some chipboard to protect his driveway (think blood, panic, pressure, tourniquet, paramedics, casualty, stitches, future scar etc) we did finally manage to get to the brakes, which – for anyone not limping – is a fairly straight forward task. There’s just Goodridge braided lines and Mintex M1144 pads to fit; you won’t find any four-pot Brembos going on here. We cleaned everything up and bled the new lines but have left the rear shoes and drums for now until after some testing to see if they require any fresh parts.
Engine bay
With no modifications allowed, there’s not a huge amount to do here other than some regular servicing. We bought a car with air-conditioning in the hope that we might gain some more power by stripping it out. After having the system bled we unbolted all the bits and changed the auxiliary belt over to a non-aircon part. We couldn’t find a diagram anywhere of how the belt should run so it was like a Japanese puzzle trying to solve the route it should run as our pulleys seemed to be in slightly different positions to anything else we could find.
We fitted three nozzles in the engine bay for the fire extinguisher along with cabling for the battery cut off switch. You can drill holes to route these into the cabin but we felt the existing large grommet was perfectly fine for what we needed.
Roll cage
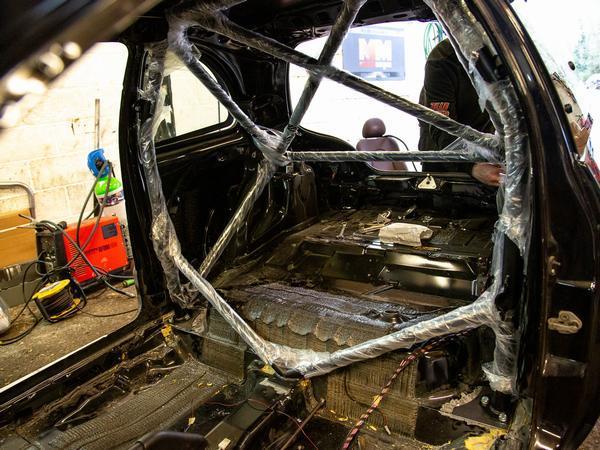
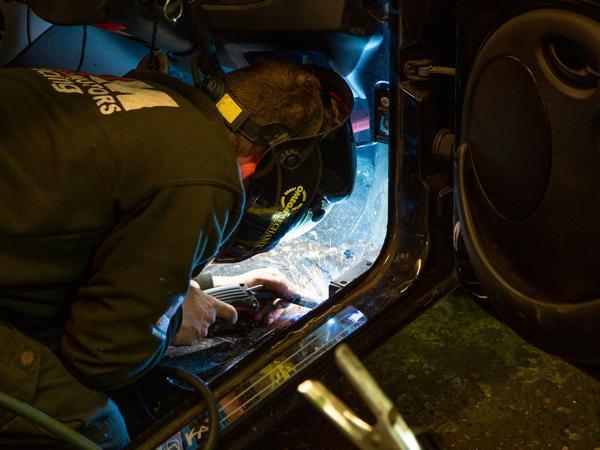
I’m an eternal optimist and had assumed that fitting our Safety Devices roll cage would be easy, and cost next to nothing. Must just be a couple of weld in base plates that we then bolt it to, right? Wrong. There are around a dozen plates that need to be welded in and it is not easy or quick job. Particular attention should be given to the plate which sits directly above the fuel pump, as several people have managed to set their cars on fire here.
As a result we were really down to the wire on getting the cage fitted. We had booked a slot with Moore’s Motors to get it done but still had no ETA on when it would arrive. We pencilled in the Friday before our first track day on the Monday. Amazingly, and in the first genuine stroke of luck since Olly didn’t bleed to death, the cage finally arrived the day before, so I set off to Moore’s in our soon to be race car after insuring it for the grand total of £195 fully comprehensive with REIS as a competition car with unlimited modifications.
The cage had to go in and out of the car quite a few times as the base plates were welded in, attempting not to smash the windscreen on each pass. Turns out Jamie at Moore’s is even more optimistic than I am with what can be achieved in a day. The cage was finished just before 17:00 on a Friday afternoon, at which point, most businesses would kick you out the door and head to the pub. But Jamie persisted and I eventually left at 22:00 with a custom fabricated subframe for our seat and harness mounts fitted.
This is hardly Moore’s first rodeo – our KA is one of eight they’ve worked on and they’re running five hire cars in the series this year – but kudos to their man too for the amount of little jobs he did along the way such as removing the inertia switch, re-routing earth points and painting his handy fabrication work.
Interior (again)
Pretty important one this, given that we’re going to be spending quite a lot of time inside the car. Other than the cage we needed a seat, harness, steering wheel, data logger, camera, fire extinguisher, rain light and the ability to operate the latter two along with a battery cut off switch within reach of the driver should they be required. We wanted two seats and harnesses though so we could go out together during testing and talk about how the car feels, give each other tips and just have some fun together ahead of the races.
One of Olly’s colleagues, Simon Didmon, is building a MK2 Escort and recommended a company called Motamec in Wales. I did some research on PH and after coming across this build thread I knew it was the gear for us as it looks the part and the prices were reasonable for a small budget too. We ordered up a load of gear from them along with a pit board and a number of tools.
The KA was never built for seats to be mounted low to the floor. We ran into an issue where a chassis cross-member impedes the ability to move the seat forward enough for anyone under 5’10 to comfortably reach the pedals. The options were to cut into the chassis brace (a no-no in our book), mount the seat much higher but risk the taller members (Matt) amongst us hitting their helmets on the roll cage/ roof, or find a happy medium where we could raise the seat slightly with a runner but still have limited reach to the pedals. (Sorry Nic.) We settled on the latter but it still took us three hours to get the seat bolted in; it was probably the most frustrating job in the whole build but we’re made up with how good it looks and how comfortable our Motamec GP1 seats are too.
We actually fitted our Novec 360 fire extinguisher system earlier in the build on a rainy day, connecting two pull cords for operation and a nozzle to spray into the driver footwell. The internal pull cord has replaced the head unit, along with the battery cut off switch and a switch to operate our rain light. We’re yet to fit a data logger or camera, but these are regulated requirements should there be an incident. We’ll update in due course once fitted.
Miscellaneous
We have to run the standard 13-inch steel wheels, so we bought three sets for £60 and had them all painted in white to match our livery – which I’ve just ordered last minute from our longstanding graphics supplier Race Graphics. (Sorry Neil.) The control tyres are Toyo CF2s from Polley Sport, pre-scrubbed at £60 a corner. Time will tell how long they last but we’ve currently budgeted for seven sets.
Refuelling has to be done using something called a Tuff jug with a multi-spout adaptor on the ripper valve (no we don’t know what it is yet either) using pump fuel only. Again we’ve got no idea how long fuel will last yet, but we’ll be arriving with quite a lot of Shell V-Power just in case.
And then there’s all the stuff you just don’t think about. Luckily for us we have another ringer chipping in as chief strategist; PHer and C1 endurance racer Geeks. We had a long chat followed by several emails this week and as a result we also need high-vis jackets, a foam fire extinguisher, tyre pressure gauges and pumps, a pit board, a kitchen timer for pit stops, a garage heater, coffee machine, a whiteboard and lots of tools and spares. Quite a few things on there we wouldn’t have thought of and only a matter of days to get it all bought.
Costs
So there you have it; you really can turn a bog standard Ford KA into a race-ready EnduroKA in four weekends with a bit of help from your friends. And with two months between the first and second race, that’s more than enough time for you to get involved if you’re still sat on the fence.
So far, our car stands us at £6,700 including buying the car, taxing/insuring it and getting it ready to race. That doesn’t include any spares, which we’ll be rushing to buy this week. Our running estimate to get through the year including the above cost is around £16k. If the car is in one piece at the end of the year and we can sell it (lets say £6K for now), then we’ll have gone racing for well under two grand each with six drivers on our team.
We’d also like to thank MSV, Burton Power, Motamec, Moore’s Motors, Graves Motorsport and all the competitors we’ve spoken to for all of the support and advice we’ve had so far. If the paddock remains this enthusiastic throughout the year, I can guarantee we’ll finish the series with a bunch of new friends and a big appetite for more racing. Which is exactly what this is all about.
Previous reports:
PH Competes: EnduroKA
PH Competes: Enduro KA media day
PH Competes: Buying the EnduroKA
Source: Read Full Article

