When all is said and done, how to trace a parasite drain is not all that difficult to understand. But as with most things in life, in order to put it in practice you need to know what you are doing and you need to have the proper tools.
BHPian Jeroen recently shared this with other enthusiasts.
We have quite a number of threads dealing with drained batteries. There are various reasons a battery could become drained. Nearly all cars do drain the battery over time. Modern cars more so than older cars.
The Internet will tell, you for a modern car, the continuous drain with everything shut down is still some 40mA. Personally, I think that is a bit on the low side these days. Irrespective, a battery should not drain to the point where it won’t be able to start the car in a matter of days. Personally, I would become suspicious if I could not leave my car parked for four weeks and find the battery drained.
Recently, I experienced a drained battery on my Jeep. I suspected a possible so called parasite drain. Something, which should not be there, that drains the battery whilst the car is parked.
I investigated the issue in detail and reported it in my “fiddling with car thread”.
But as I have seen numerous similar problems being reported on the forum, I thought I do a little write up on this phenomen parasite drain. The name suggest it is something you don’t want and it is also sneaky. In Dutch we call it clandestine drain. Different word, but same sentiment. You don’t want it!! Just to be clear, it is a drain over and above the “normal” drain on your battery.
When your car fails to start, first order of business is to determine whether it is actually the battery. Even without any tools it is usually easy to check. If you turn the ignition key on and try to start and nothing happens, not even a click of the starter motor relay (Bendix) it might be the battery. Another easy test is to turn the ignition on and put the headlights on. If they appear dim, or don’t light up at all, chances are you have a drained battery.
If you have a multimeter you could also check the battery voltage. Without the engine running, you should have at least 11,5V, preferably you want it to be well above 12V really. With the voltmeter attached switch on the lights, if the voltage drops considerable, again you might have a drained battery.
When you experience a drained battery, the simplest thing is too jump start the car, using jump leads, booster pack or even just pushing/towing the car and dumping the clutch whilst in gear, usually gets it going. Do check your owner manual on what the procedure is!! Not all cars can be jumpstarted, or even towed.
There is always the possibility that the battery is simply at its end of its useful life. Voltage readings of the battery and during charging give some indications, but to get a proper diagnosis of the state of the battery you need to have a special battery capacity measurement tool.
Of course, if your alternator is not charging properly you will end up with a drained battery. But in nearly all cases you are likely to get a yellow and or red warning light if the battery is not charging properly.
When you experience an unexpected drained battery you might want to check a few simple things first. On modern cars switching the ignition off, will switch of most electrical power to all the various electrical users. Not all, we will talk about that further on. But for instance radio, car external lights and so on tend to switch off, sometimes with a bit of time delay. But you might have inadvertently left something on, that is still powered irrespective of the ignition key position. Think parking lights, think internal cabin light, valet lights, internal light in the dashboard or the light inside the boot!
My Alfa Spider suffered from a drained battery and it was a very simple internal valet light underneath the glove compartment. The light fitting itself is the switch too. Passengers often, inadvertently, switched it permanently on, with their legs. You would never notice, because it had a minuscule bulb. But it was enough to drain the battery in a couple of days!
Glove compartment and boot lights tend to be switched by means of some type of push switch in the door/boot frame. But sometimes they go wonky and again it will be a matter of days before your battery is fully drained. One tiny bulb will do that! Easy to test; put your mobile phone on video, stick it into the glove compartment or boot, close it and open it up after a minute or so. Review the video to check the light goes out when the lid closes!
If you noticed the battery draining unexpectedly after work has been carried out, check carefully all wiring, connectors and so near the spot where the work was carried out.
By far the biggest cause of parasite drains tend to be incorrectly installed aftermarket accessories. On quite a few cars, the cigarette lighter is permanently powered. If you keep a USB charger in there, well… easy guessing!
Before digging in, a few thoughts about multimeters. Because if you want to trace a parasite drain you will need a multimeter capable of measure tiny voltages, tiny and big currents.
You need to be able to measure with a reasonable degree of accuracy too. Multimeters come in analogue and digital versions. The digital ones are not necessarily more accurate. You really need to read the specification for the accuracy. The number of digit it displays is not necessarily an indication of its accuracy and or resolution.
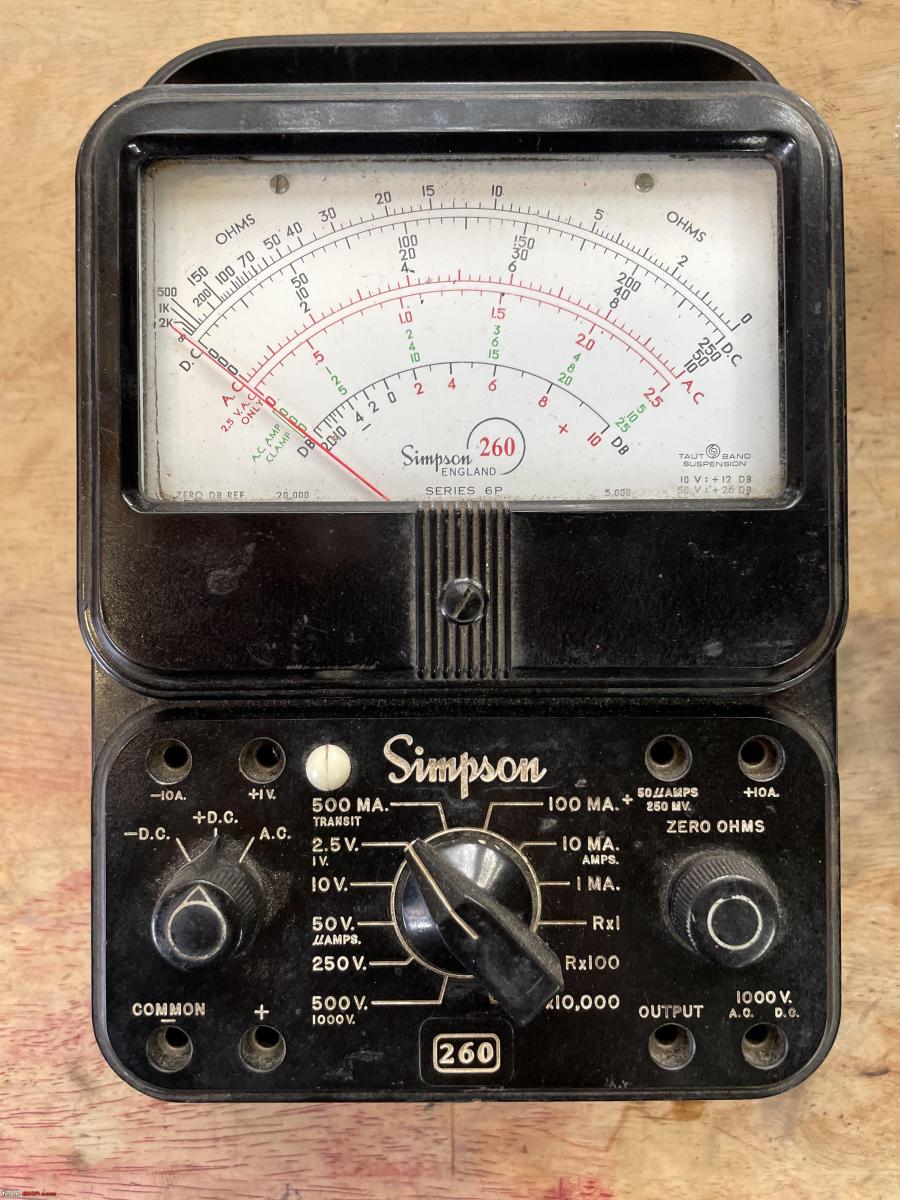
I have a collection of analogue measuring instruments, including this very nice analogue multimeter. Probably fifty years old, still working. Anorak fact: This is a Simpson 260, they have been manufactured from about 1930 and are still in production. The earlier models are very similar to the current ones. Current price is approx $500! It is considered superior to digital multimeters for specific applications.
But I tend to use a digital multimeter for several reasons. They tend to be more far more robust, important in a workshop. If you drop it, it is more likely to still work properly than an analogue one.
Also, most digital multimeters are simply much more convenient to use. You don’t need to worry about choosing the correct scale so much. Within reason the internals are protected and you just rotate the knob to get the correct reading. Also, it doesn’t matter if you mess up the plus and minus as the display will display + and – as well. Getting your polarity wrong on most analogue meters might damage it!
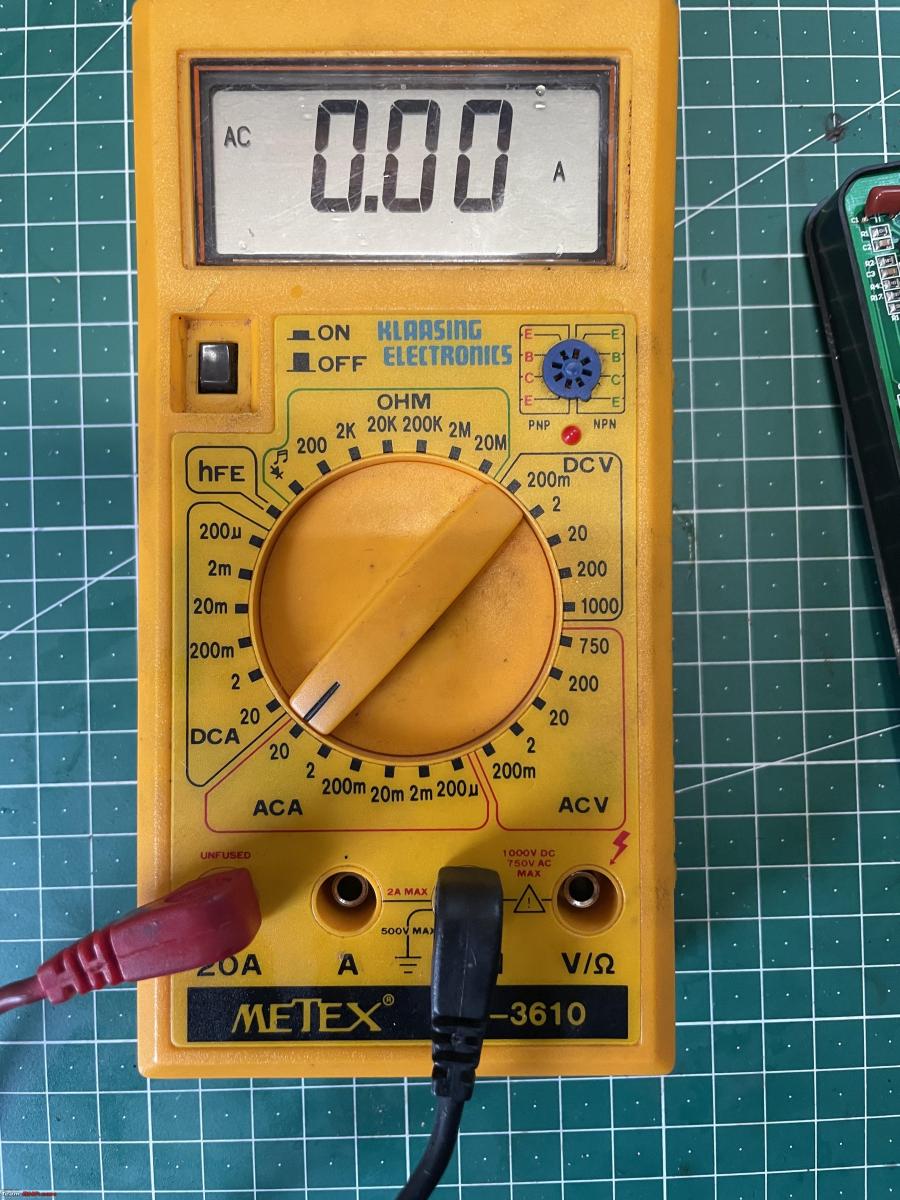
A word of caution though on the measurement of currents. When you start measuring you might easily find yourself having to deal with 2-6 Amps. That is quite a lot for these multimeters. You do need to make sure you connect the measuring probes correctly for the respective amps. Which is always different from voltage and for instance resistance measurements.
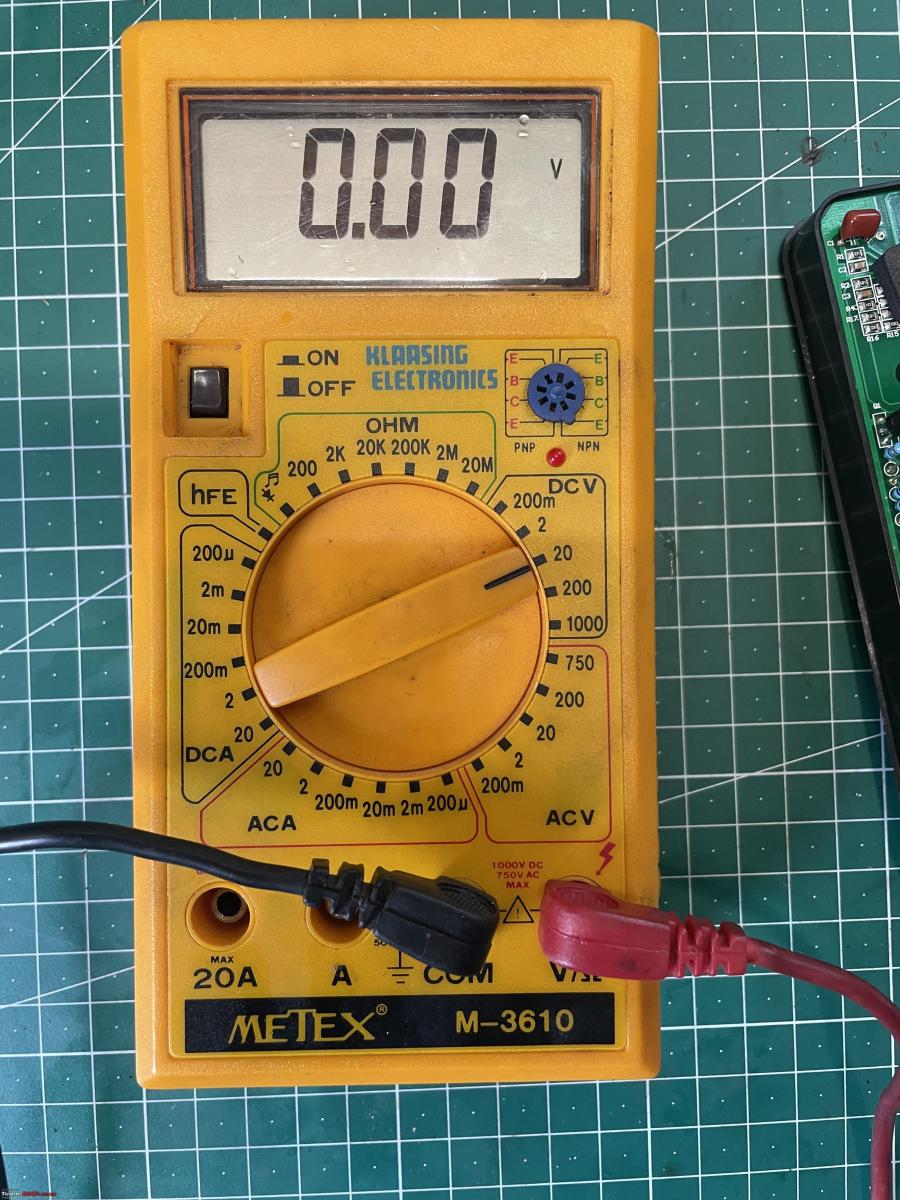
Here you see my multimeter set up for measuring up to 20VDC. Black lead in the common/mass connector and the red lead in the Volt / Ohm connector.
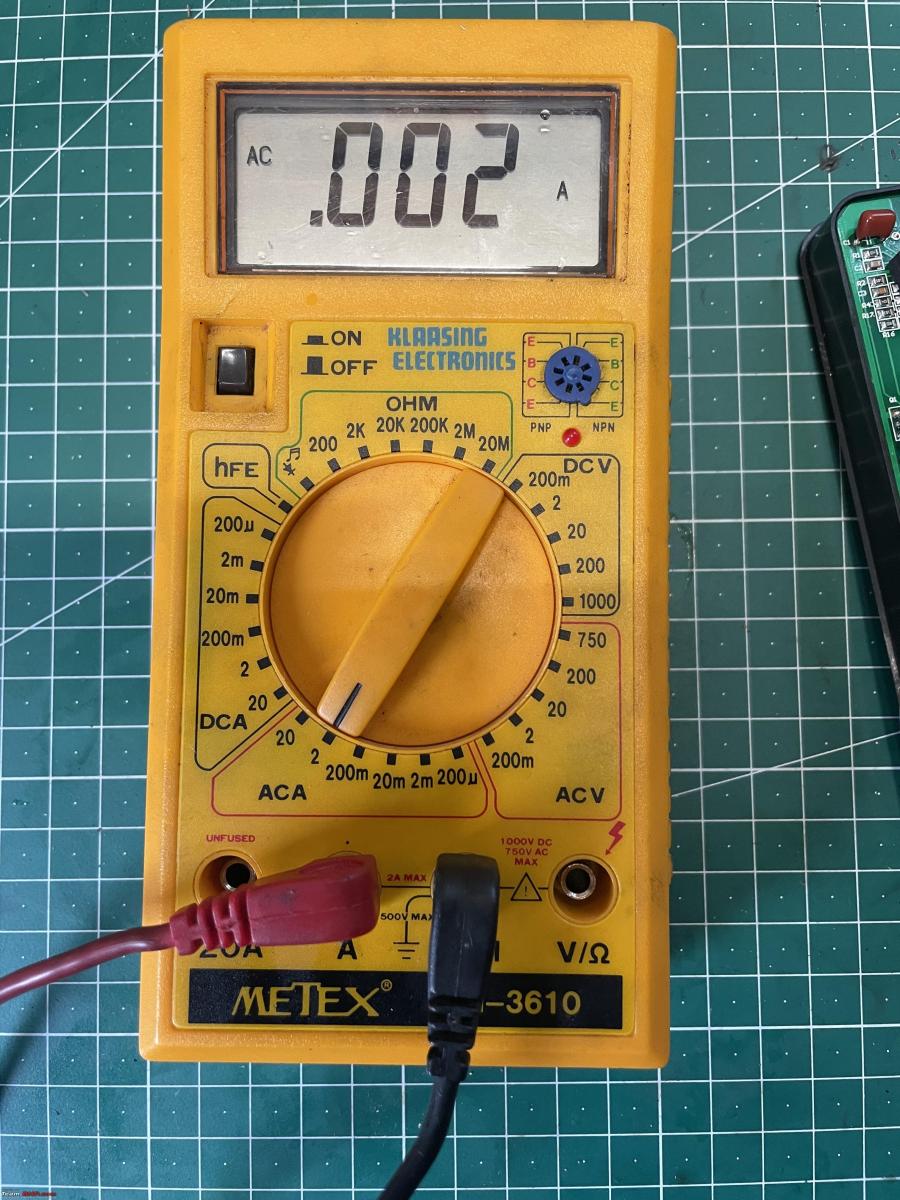
Here it is set up to measure up to 2 ACA. Note the red lead has moved to the dedicated 2A connector!
Here it is set up to measure up to 20ACA. Note the red lead has moved to the dedicated 20A connector. Also note the red text right above the connector. Unfused.
On many digital multimeters the highest current setting is unfused. So you better know what you are doing, or you might blow up, or probably melt down your multimeter!! Also, most of these kind of multimeters are not suitable to measure high amps continuously. Neither the leads/probes and or the internal components can handle it. Anything over a few Amps, you need to disconnect the meter every 30-60 seconds or so.
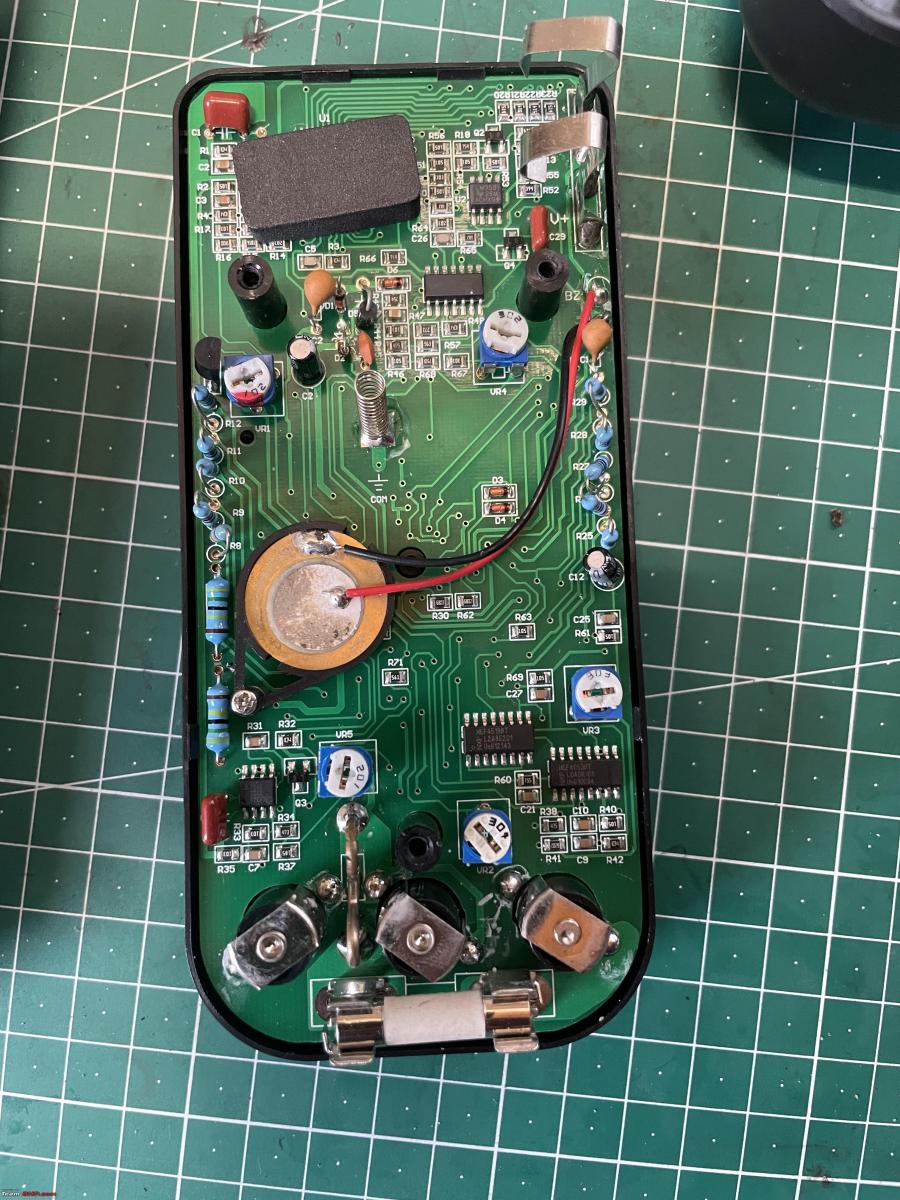
All digital multimeters will have an internal power source, very often a 9V battery and a fuse. One of the advantages of an analogue meter is they do not require an internal power source to measure voltages or currents. (only for resistance measurement)
Here you see the internals of one of my other multimeters. I had to open it us as the internal battery (note the clips in the top right corner) was drained and also the fuse (10A) was blown!
Just about all cars have some electrical drain when shut down. Even my 40 year old, W123 uses a bit of electricity. The clock and the radio. Most car radio/audio centre are switched by means of the ignition key. But most radio’s / auto centre are also connected directly to a positive terminal. This ensures that all presets in your radio / audio centre remain intact with the engine switched off. But that does require a small, tiny, continuous drain on the battery.
Anybody who has installed aftermarket radio’s in their cars, would be familiar with the typical power supply wiring for a car radio. One black wire minus (mass), one red plus wire (switched), one red plus wire (continuous). (and maybe another wire for the automatic antenna.)
Those of my age will also remember very early radio’s with mechanical presets! Those would have only two wires.
OK, so you have established that you have a drained battery and the suspicion is that it is related to a parasite drain. You have checked the obvious (see above). Now it is time to dig in and take some proper measurements to determine what is causing the parasite drain.
The internet will tell you to simply “pull fuses one by one”, but that might not work on modern cars. In fact on modern cars, pulling fuses might not work at all. Besides, what and where are you measuring. Broadly speaking there are two different approached to finding a parasite drain. By measuring voltage drop across each fuse. Or by measuring current draw in the respective circuits. I will discuss both methods.
In theory the voltage drop measurement is the best. Especially if you have a modern car.
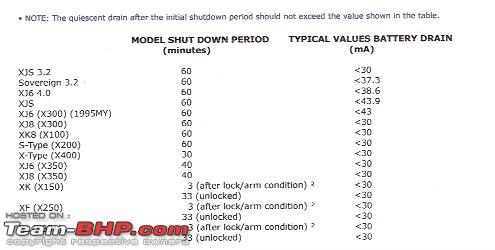
Modern cars have become a bit of a challenge when it comes to finding parasite drains. One might expect that when the car is locked and undisturbed, electrical activity ceases and current drain from the battery drops to (near) zero. Unfortunately, this is not the case. When locked and undisturbed the car is shut down or sleep mode. It will still be drawing a so called quiescent current. On modern cars this quiescent current is required to maintains various on board data (system and control module settings), time, memory settings, and to monitor the Passive anti lock system and alarm module. What is also important to note is that on almost all cars it take a certain amount of time before the car is, from an electrical point of view in this sleep mode.
As an example see this little table about various Jaguars
It is important to understand what the normal quiescent drain is, when you try to trace a parasite drain. Because the parasite drain will be on top of it. So the question is really, what is the baseline, how much voltage/current should you have at various points?
An additional challenge is that for instance pulling a fuse, or opening a door, will wake up the car systems.
I did a little test on my Jaguar X308/XJR. Although this car is twenty years old, it has a very complex, elaborate electrical and electronically systems. This car has some 10 fuseboxes and 12 computers, scattered all over the car.
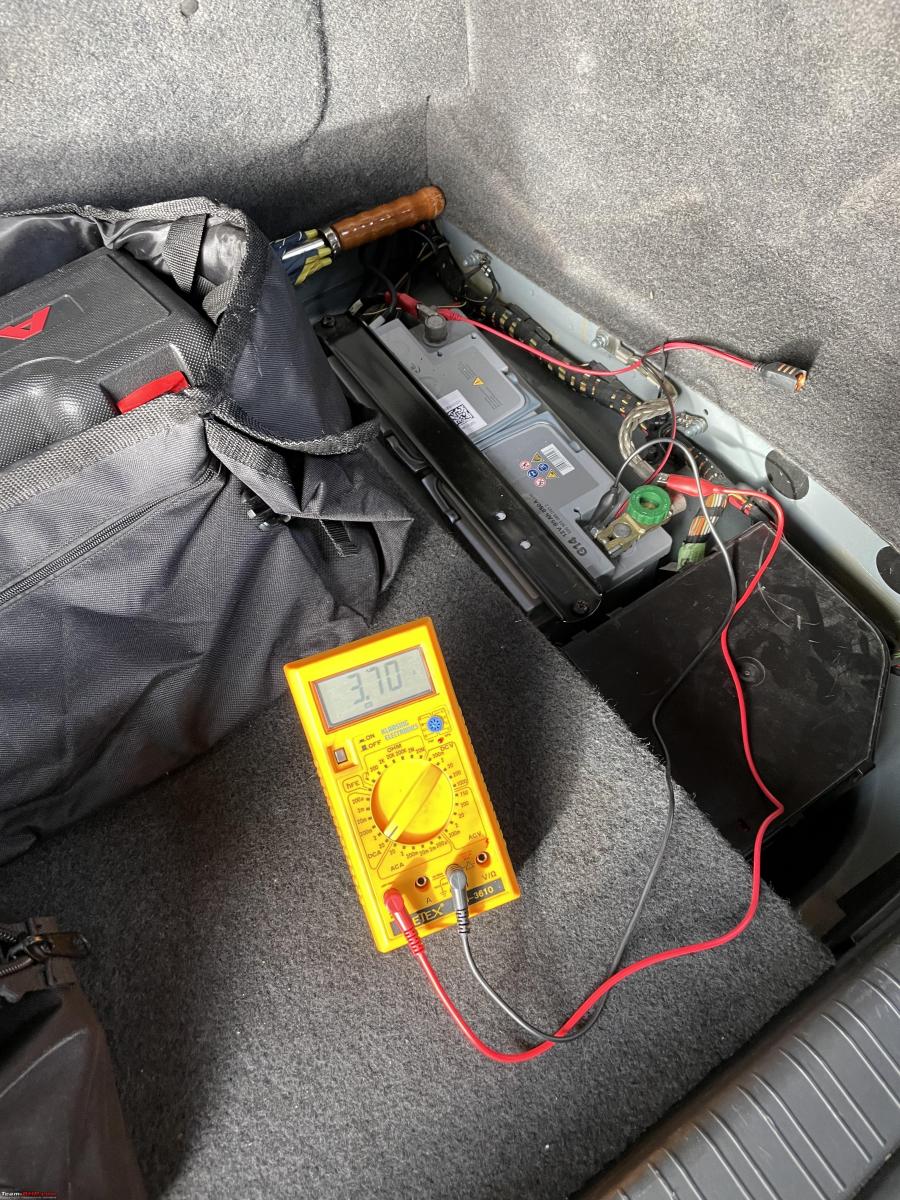
The battery is in the boot. So I hooked up my trusted multimeter to the battery:
Note the battery quick disconnect installed. My multimeter is attached on both sides of the disconnect. So when I disconnect the battery by turning the green knob, effectively the multimeter is in series with all the electric circuits of the car. All current is flowing through the meter.
Note that the multimeter is showing 3,7Amps!! This is with the boot and the driver door open. After about 15 seconds the current drops to 1,5A. Because I closed the door and the cabin lights dim with a delay. The boot is still open and also has a boot light. After a while that dims too, even though the boot is still open. The current drops to 0,6A. After about 15 minutes the current drops further to about 0,31 A. Another 30 minutes and the current drops to 0,074A (74mA).
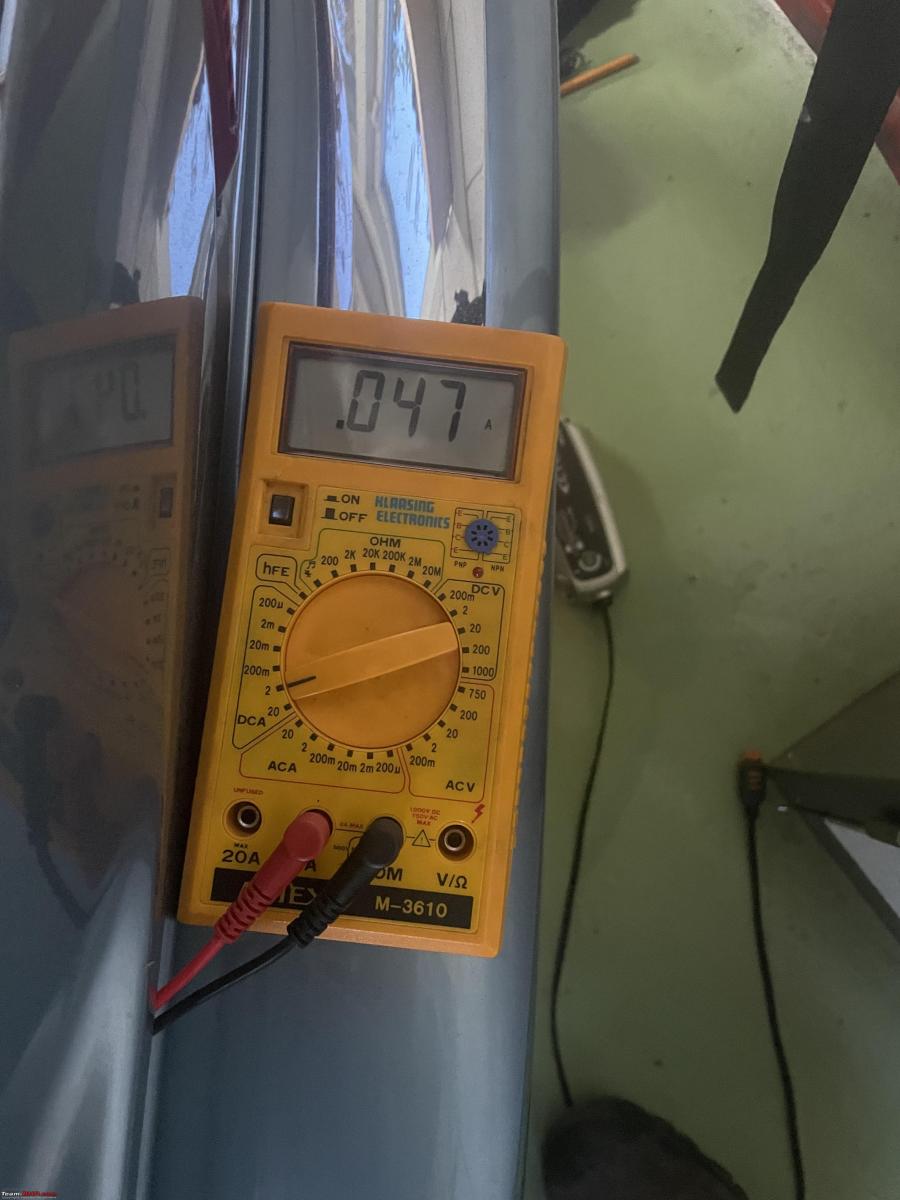
It stayed at 74mA, till I shut the boot properly. Have a look:
This car has a boot open indication on the dashboard. Even with everything shut down, key out of the ignition it keeps monitoring that boot light switch. Only by closing the boot, the current dropped to 0,047 A (47mA).
This is the quiescent current drain of my Jaguar. This car has a Varta G14 95Ah battery. So in theory this quiescent current will drain the battery completely in (95/0,047)/24 = 84 days / 12 weeks. Obviously, it will not be able to start the car in a much shorter period. But simple math will tell you that if you have a parasite drain of only 40mA that will effectively half the time the battery will last. So even a small electrical problem, e.g. a positive wire chaffing and touching the chassis, can cause your battery to drain in a matter of days.
So before you start it is helpful to understand what quiescent current drain your car has. You won’t find it in your owners manual. You do need a proper workshop manual. You also need to understand how to keep the car in sleep mode. Or you might be measuring the wrong things all together.
Here is how car mechanics are/should be taught how to trace a parasite drain:
First you hook up some multimeter that measures the total draw on the battery. In this image (borrowed from the internet) a current clamp. And it shows a current of 1,9 Amps. You need to an initial measurement and then wait for the time period to reach sleep status and take another measurement.
What you could do is pull each fuse and see if the current drops. However, you might trigger the car out of its sleep mode. An ECU might reset and hide the problem etc.
Better to do the following
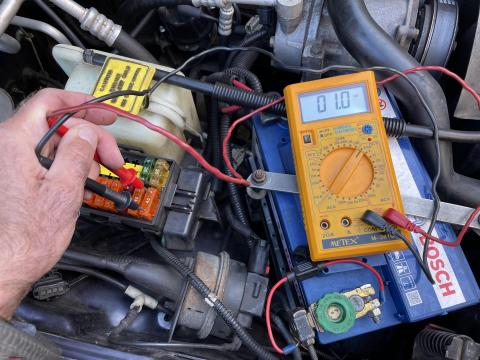
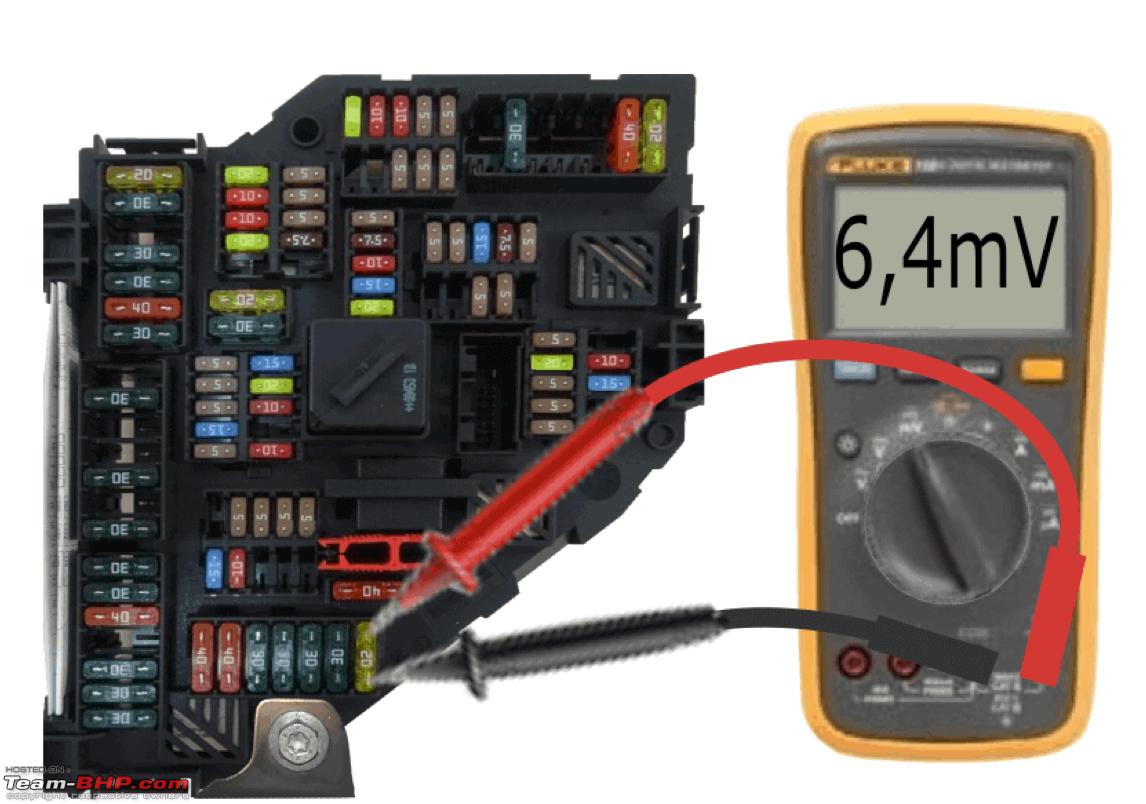
You take another multimeter, set to measure mV and start taking readings across each and every fuse.
These fuses have a known internal resistance. When current is passed through the respective fuse, there will be a voltage drop or rather differential. The voltage differential is a measure for the current through the fuse. You can look up the current value in these sort of tables.
There are different kind of tables available for different kind of fuses. You can find them, for free, on the internet. Just search for blade fuse voltage drop.
So you are looking for unexpected high values, above the quiescent drain. You might have to check all the fuses, because you need to get an image on how the total current is divided across the respective circuits.
Once you are able to establish the respective circuit you need start to investigate all the components, wiring, connectors etc of that circuit.
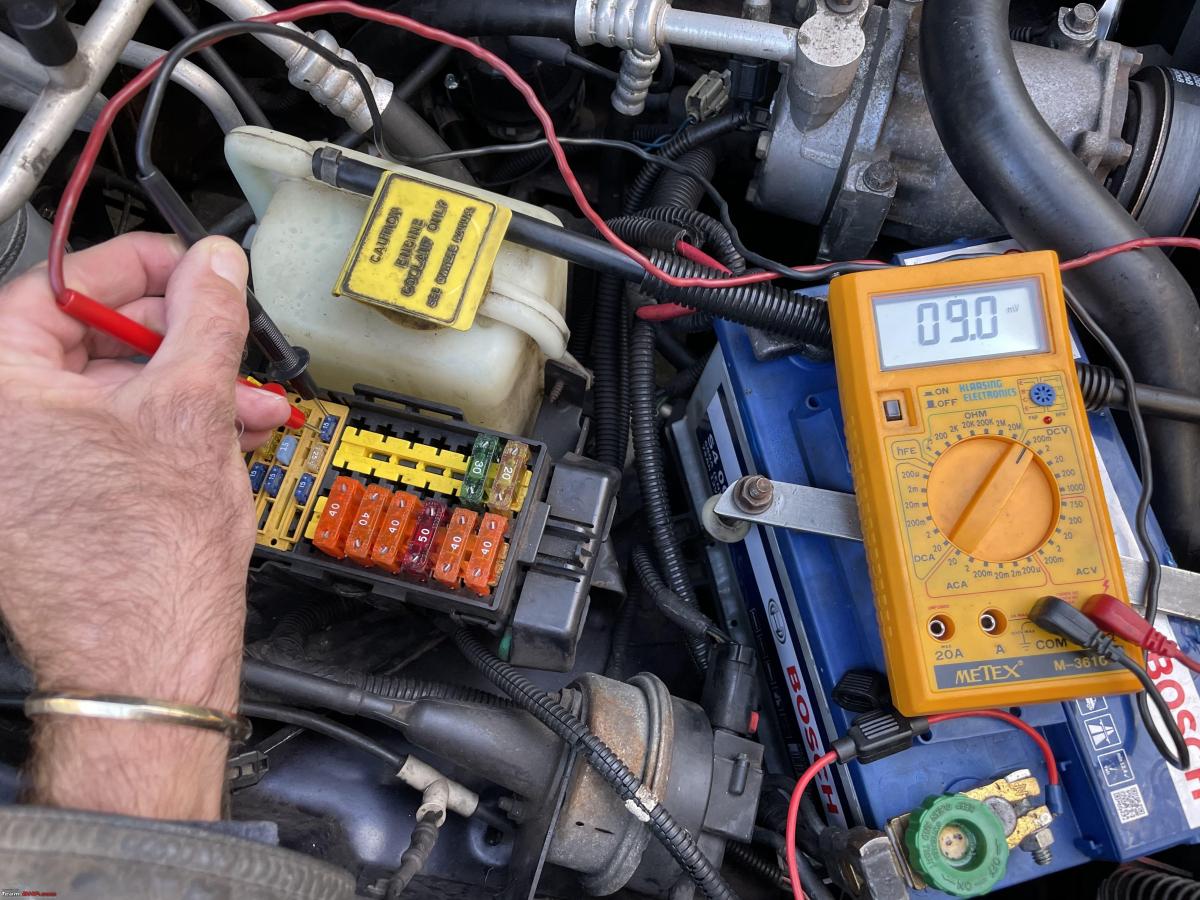
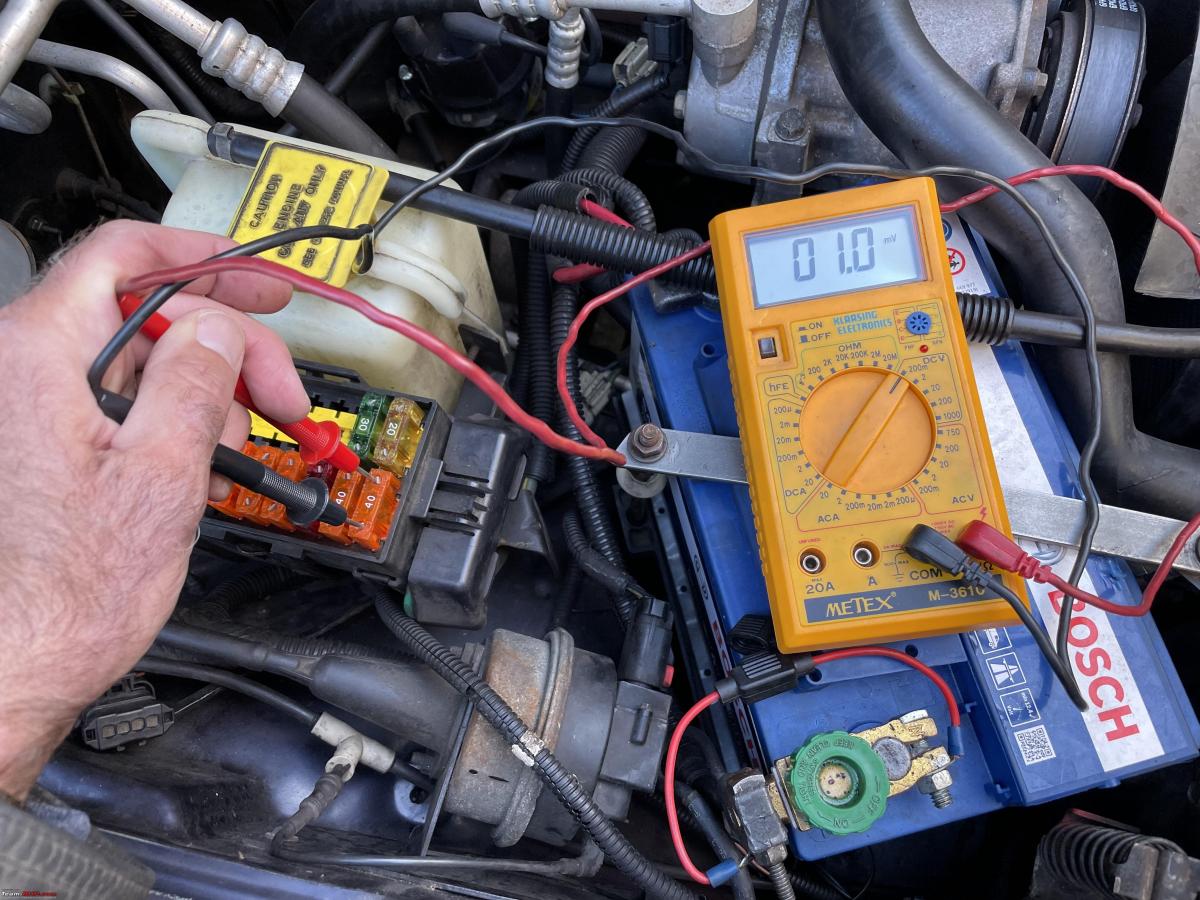
I did a little test on my Jeep as well, these are the two fuses/circuits I found carried a lot of current during my earlier investigations:
Fuse 15: 9mV which means 1,77Amps according to the table
Fuse 40: 1mV
During all of this you must ensure the car is kept in sleep mode. As you need access to the fuseboxes, you might have to disable door and or hood switches as well.
This method works well, but you do need a multimeter with a pretty good mV accuracy. I have found that the quality of blade fuses differs wildly. Which also means the internal resistance varies and you might get lost in the tables.
This method works pretty well if you have a large parasite current drain. (As in the above case). For smaller current parasite drains, it might become more and more difficult.
So you might have to resort to just pulling fuses. By just observing what happens you might very well be able to identify the correct fuse, circuit.
I will talk you through what happened with my Jeep, similar to how I described it in my other thread. But I will add some more detail and also some considerations for more modern cars.
If you have followed my “fiddling” thread you will know that I recently replaced both the battery and the alternator. I use my Jeep pretty regularly, or at least once a week.
So I was surprised to get an email the other day from Amsterdam Airport Valet parking. I had left my Jeep there 12 days earlier. They wanted to move my Jeep and found the battery empty. I gave them permission to start it using a booster. The next day I arrived at Amsterdam, Jeep started with no problems and seems to be running fine.
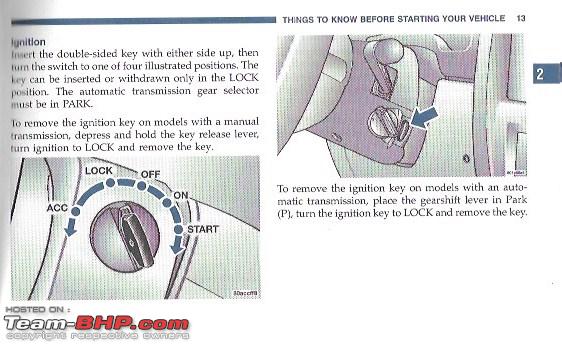
So it was a bit of a mystery to me, what had happened. And my first thought were about some sort of parasite drain. Although I also had a hunch it might be a different issue. The ignition key on my Jeep has a so called off ACC (Accessories) position.
With the key in the ACC position a number of electrical systems is powered on. For instance the radio, the electric doors etc. So it was likely that in the ACC position a larger current would be drawn then the quiescent current in sleep mode.
Because this is a 25 year old Jeep, with 320.000 km on it, the key lock mechanism is somewhat wonky. If you are not familiar with it, you might just turn the key anti-clockwise till it stops. But then you place it in the ACC position. I had a suspicion that this is what might have happened with the Valet Parking guys. ACC functions are pretty rare on cars these days.
So I needed to check what the quiescent current on the Jeep is and how much more the ACC position adds to it. I checked my workshop manuals and Jeep forums, but nobody could tell me anything about current draws. One thing is for sure, this Jeep will go into sleep or sleep ACC mode within 10 seconds of pulling the ignition key out. So that made things a bit easier.
Jeep parked in my garage, ready for some measurements
First I decided to take a current measurement: All my cars have one of these quick disconnect knobs installed on the battery. It has a little fuse across it, to keep radio settings and so on when you disconnect it by turning the green knob.
I took the fuse out, connected my multimeter before and after the disconnect, so by turning the knob (disconnecting) any current will go through the multimeter. Here you see it with the knob still in the connecting position, so no current obviously.
Next, I closed the doors, ensured the internal lights were off, ignition in the off position. I get a reading of 26,1mA.
Next I do the same but with the ignition in the ACC position. I get a reading of just over 1A!
So it was very obvious that with the Jeep in sleep mode all was well, i.e. a 26mA quiescent current drain is completely normal. However, the ignition in ACC position the 1A seemed high. But it did explain why the battery drained at the airport at the Valet Parking. The Valet guys would have accidentally put it in ACC,
This Jeep has a brand new Bosch Blue battery, 74AH. At a draw of 1A it would be completely drained in 74 hours, less than a week!!
i still wanted to make sure the 1A was normal for this ACC position. So I put the key into the ACC position, radio off, and door closed (otherwise the interior light comes on). Under these circumstances I measure about 1A.
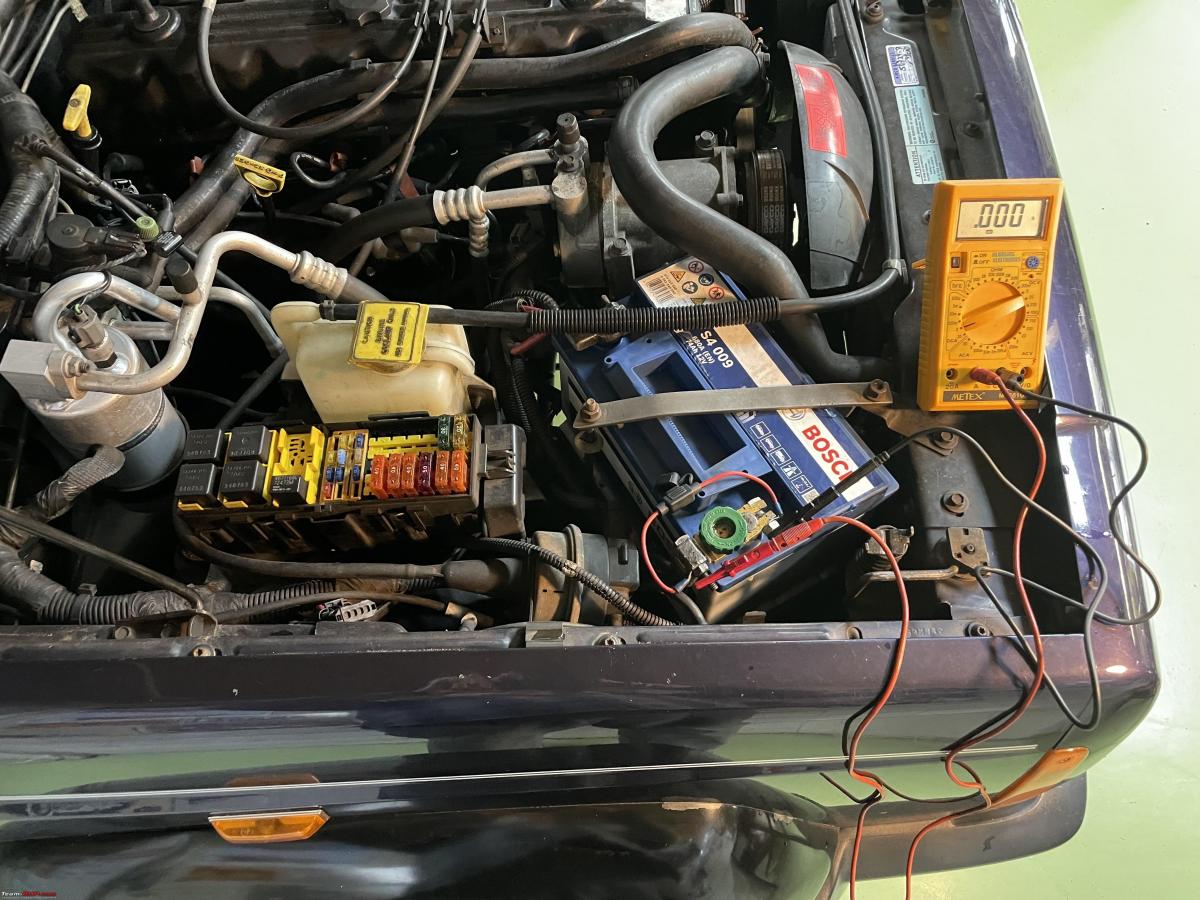
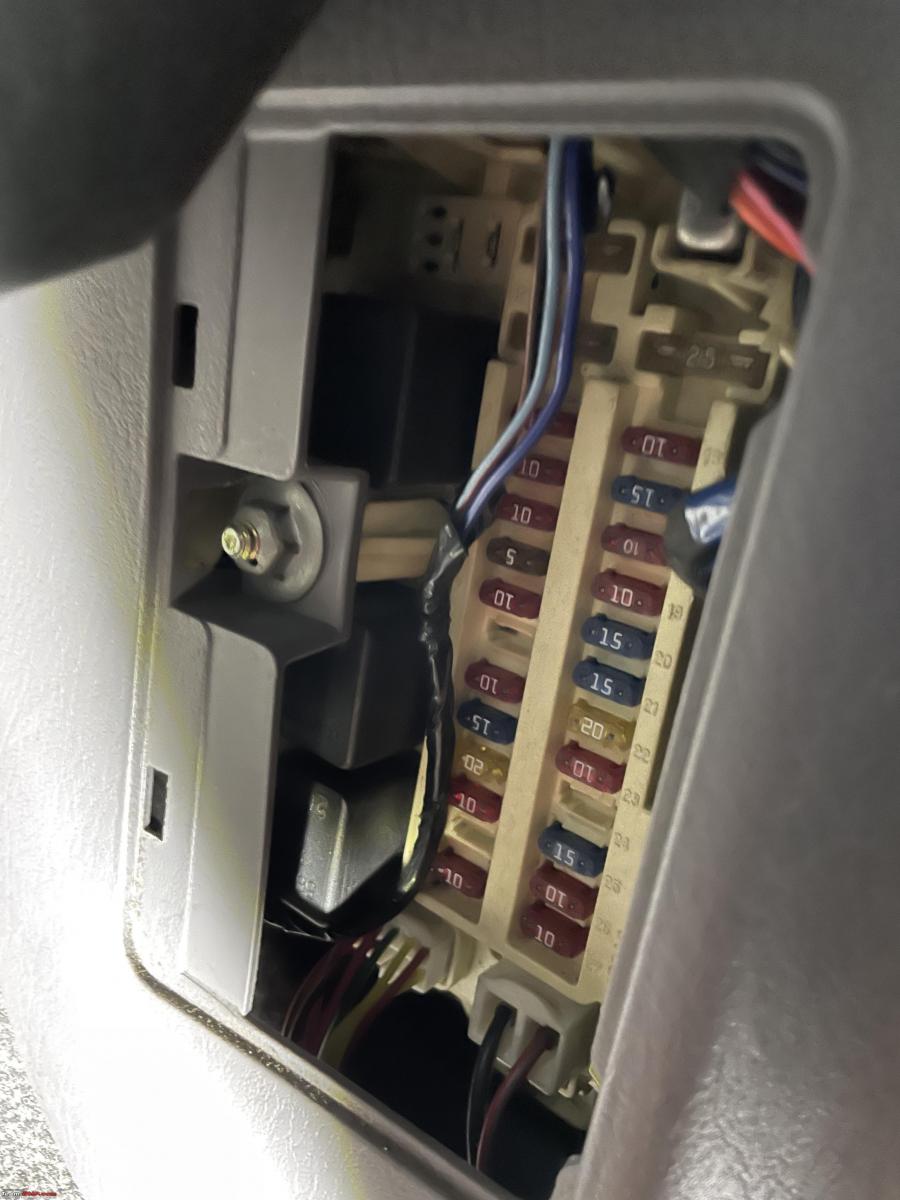
The Jeep has two fuse boxes. One as shown in the above image, in the engine compartment. Jeep calls this the PDC or Power Distribution Centre. There is also a fusebox inside the passenger compartment shown below:
Interestingly, the owners manual only mentions the fusebox inside the passenger compartment. I have seen a similar thing on the Jaguar as well, not all fuses are mentioned in the owners manual. You really need to consult the workshop manuals to get the complete picture. So be aware!!
So I put the key into the ACC position, radio off, and door closed (otherwise the interior light comes on). Under these circumstances I measure about 1A.
So I started pulling fuses one by one. Every time checking the multimeter.
I saw a very noticeable drop on two fuses, number 23, small 15A and number 2 a large 40A. Both halved the draw approximately.
Fuse number 23 is in the Sentry key Immobiliser unit. But my Jeep does not have an Immobiliser. But with some further tracing, it appears my Parrot unit is hooked up to this circuit. Switching the Parrot off completely showed it was accounting for all the drop in amps when pulling fuse 23.
A Parrot is an electronic aftermarket device which allows your mobile phone to connect to your car sound system (speakers) via blue tooth. It has its own little microphone, so it is effectively a hands free mobile phone system. Switches sound from the radio to the call. Very simple, very effective.
So fuse 2 accounts for the remainder of the draw, about 50%. I have been doing some digging into the electrical drawings of my Jeep workshop manual. I am pretty sure this a quite normal.
So, in the end not a parasite drain on my Jeep. But I did learn a few things about my Jeep and its electrics. One thing I learned is how the wired the aftermarket Parrot unit. I mentioned earlier that aftermarket accessories often cause problems. Not necessarily because of poor quality, but due to poor quality workmanship in how they have been installed. Take my Parrot, it is wired up to a fused and ignition switched circuit. So with the ignition key off, no drain. But if somebody had installed it incorrectly and hooked it up to a permanent plus, it would be a continuous 400mA drain on the battery. Talk about a parasite!!
I hope you enjoyed reading up about this topic.
I found an excellent video explaining all the various aspects of tracing parasite drains I have described.
When all is said and done, how to trace a parasite drain is not all that difficult to understand. But as with most things in life, in order to put it in practice you need to know what you are doing and you need to have the proper tools. The methods I described show you how to identify the circuit with the parasite drain. You will still need to find the exact problem within that circuit which could be very, very time consuming.
Also, there might be cases where the problem is not in a fused circuit. Almost all cars have a number of plus wires running from the battery to various parts of the car without a fuse. Or at least a fuse in the regular fuseboxes. A good example for instance is that continues plus for a radio. Or for instance an immobilizer.
Jeroen
Read BHPian comments for more insights and information.
Source: Read Full Article
